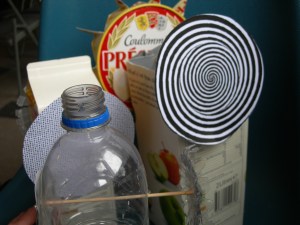
Make a water wheel powered optical illusion as part of Geevor’s National Science and Engineering Week celebrations and win yourself free family entry to Geevor for a year or a Geevor goody bag (your choice). Follow the instructions below to make your wheel, take a photo of yourselves with your wheel and email it to jo.buckingham@geevor.com or tweet us @geevormuseum using hashtag #scrapheapchallenge. Our favourite photo will win. Photos will be put up on our social media sites.
Instructions
You will need:
Scrap (plastic containers and tetra pack are good), scissors, strong tape, wooden barbecue skewers. Younger children will need adults to help
with scissors, making holes and tape.
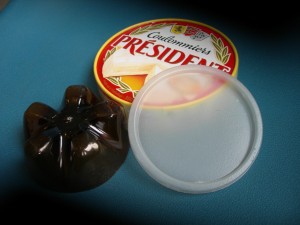
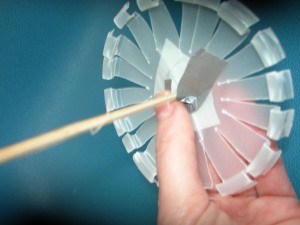
To make the wheel for your water wheel you need a circular piece of scrap (a lid, cheese triangle box or the bottom cut of a bottle all work well).
2. Paddles
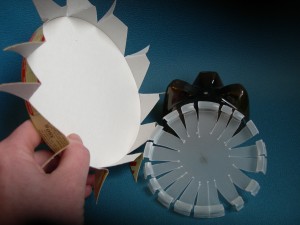
Your wheel needs paddles for the water to hit. The simplest way of making them is to cut out notches into the edge of your wheel. If you are using the bottom of a bottle, you may find that it has nobbly bits on, if so these will be your paddles. If you are using the lid of a cardboard cheese box you can made diagonal cuts and they fold them back to make the paddles.
3. Stand
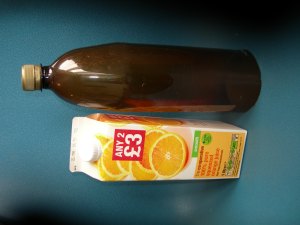
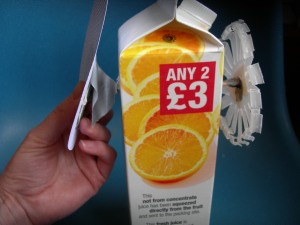
To make your stand you need something tall. A bottle or juice tetra pack works well and can be filled with water later to make it extra stable.
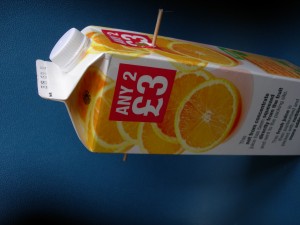
You need to make 2 holes in your stand frount and back at the same hight. You can make this by pushing the scewer in or using scissors. Be careful! The holes need to we widened to fit the scewer so it can turn easily.
4. Axel
A barbeque skewer needs to cut about 4cm longer that the width of the stand so that it will go through both the holes with a bit extra on each side.
5. Attach wheel to axel
Try to find the middle of the wheel. Push or a cut a hole for the axel to go through the wheel and secure it front and back with tape and put it through the stand. It should turn smoothly.
6. Make and attach spinner.
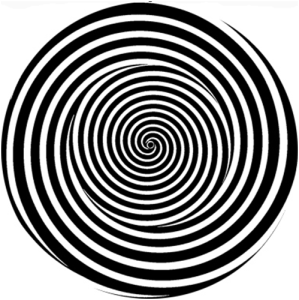
Print out the spinner pattern on to card. I found this one and others at http://www.jclahr.com/science/illusions/spin/handout/index.html WARNING! Be aware that moving optical illusions of this kind have been known to cause epileptic fits in those people susceptible to photo epileptic seizures.
A diameter of about 10cm is good. Or you could try to draw something similar.
Cut it out. I made mine stronger by putting a bit more card on the back and then I attached it to the other end of the axel using tape. It can be a bit fiddly. Try spinning the wheel, it should turn smoothly and evenly. If it does not check that the holes for the axel are big enough and that the wheel and spinner are attch to the axel at their middle.
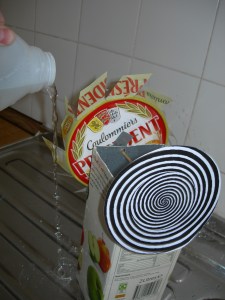
Now you have your finished water wheel.
7. How to make it work
Place on a draining surface that can get wet. A draining board, sink or outside are best. If your stand can be filled with water to make it more stable do it now or hold it steady.
Fill up a container with water, poor the water on to the paddles of your water wheel. Stare at the centre of the optical illusion spinner. It should look quite strange. If you look away it will appear as though things are still moving. Try looking at a flower. WARNING- if you look for a long time, it can make you feel a bit dizzy.
8.Experiment
Try out different designs using different scrap. Try using your wheel to power other things.
9. Tell us about it
Email a photo of your wheel or wheels and tell us about building it (to jo.buckingham@geevor.com). Or tweet to @geevormuseum. I will be putting photos up in our blog and facebook and our favourite will win a Geevor goody bag or free family entry to Geevor for a year (your choice).
